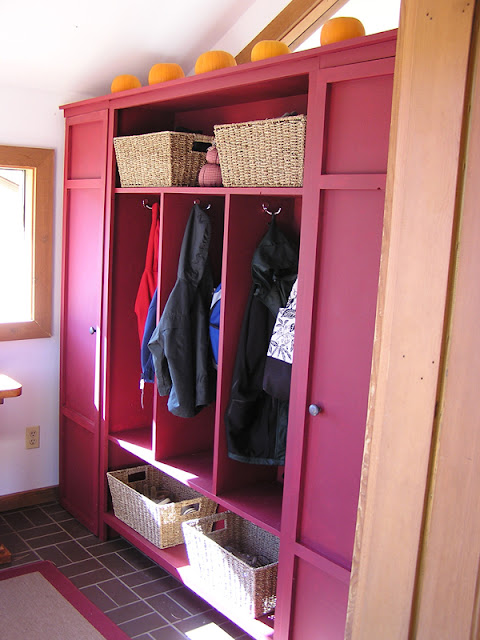
It's been five months since I last posted. I haven't stopped crafting and creating - life just got crazy. Suddenly having two kids in school makes for a busy life. Not to worry, though. I get antsy when I can't make things, so there'll be new projects in the future. Meanwhile, would you like a look at my latest woodworking success?
You might remember how much fun I had making the picnic table with plans from Knockoff Wood. I was so pleased with the way that the table came out, and with my new found carpentry confidence, I figured I could tackle something a little more complicated. So this time, I discovered Ana's plans for the Locker Cabinet. I loved the look of her cabinet that she created for her entryway. The only problem - it didn't fit exactly like I wanted it to.
So I pulled out my trusty tape measure, my pencil and my graph paper, and set to work altering the plans and creating my own plans for two matching "closets" that would flank the ends of the locker cabinet. First I reworked Ana's plan to make the locker cabinet taller. As you can see from the photos, I have an oddly shaped window in my entryway. It looks out onto a sunroom that was added after the house was built. It's not a pretty view, and although I like the extra light in the entryway, I knew that I could cover the less-than-desirable view while still getting ample light from the window.
Next, I needed two closets. We live in a house with no coat closet and no broom closet. Although the lockers solved the problem of where to put our coats, hats, boots, etc., the unit didn't solve my problem of where to put my vacuum, mops, etc. I was so tired of tripping on them everytime I went into the bedroom closet to change my clothes. So I whipped up some designs for two tall, skinny cabinets that could attach to the locker unit. Thanks to Ana's plans for an armoire, I was able to design some doors that I liked for the closets. I spent one weekend building the three pieces: one locker cabinet and two closets. I spent the second Saturday priming, painting and attaching the pieces together. With a final piece of trim across the top, the unit looked like it was designed as one. Don't you just love the red paint. The color is called Cherry Chocolate - sound yummy, doesn't it? It looked like pink nail polish while it was going on, but it dried to a nice dark shade of red. Love it!!
And here's the new closet that hides my vacuum. I made adjustable shelves for the closet on the other end. This is where I stash my extra paper towels, cleaning supplies and more.
What a rewarding way to spend a couple of weekends. As usual, many thanks to Ana for the inspiration!


OMG, sooo jealous! This looks great. I've been meaning to put Ana's plans into action one day. I want to start with a bench for our entry way and get nervous.
ReplyDeleteIt looks so good! You can be very proud of yourself that you made this all by yourself!!
ReplyDeleteI'm glad to see you're back. Please post more of the creations that you make :)
Leonie xx
Hey! I just nominated you for the Stylish Blogger Award. Find out more about it here: http://niftythriftythings.blogspot.com/2011/02/stylish-blogger-award.htm
ReplyDeleteXOXO, Vanessa and greetings from Germany @ {nifty thrifty things}
what a great cubby set up..and really like the color!
ReplyDeleteI have given you an award! Congratulations!
ReplyDeletehttp://toquascrafts.blogspot.com/2011/05/one-lovely-blog-award.html